/prod01/channel_54/media/header-images/ThinkstockPhotos-543066492.jpg)
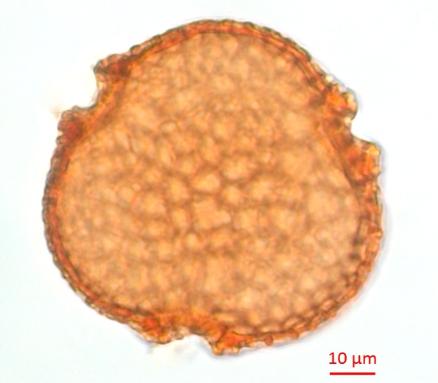
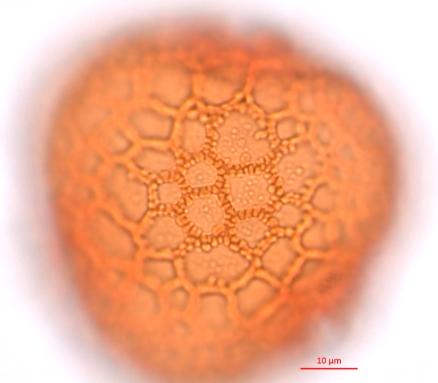
Along with a morphological description, we aim to provide a series of photographs at various orientations of the pollen grains to give the user a generalized idea of the structures and characteristics present in the sample. These images are focused on major identifying characteristics, such as the aperture or polar shape of the grain. Below, there are a few examples of pollen grain images that have been taken and added to our database.
Polar view (Left), Surface Pattern (Right)
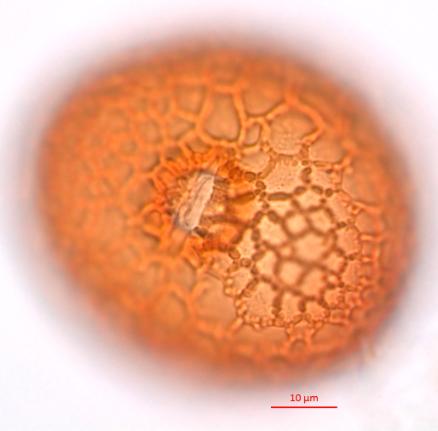
Aperture and Equatorial view
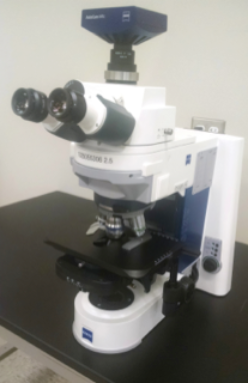
ZEN Blue 2012 imaging software is used in conjunction with a Zeiss Axio Imager.A2 or Imager.M2 microscope equipped with an AxioCam MRc camera to photograph individual pollen grains under 1000x magnification.
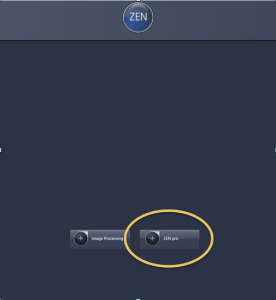
To calibrate the Axio Imager microscope with the ZEN Blue 2012 software, the microscope must be turned on prior to opening the software. This will allow for the software to recognize the microscope components, and the measurement functionality will be automatically calibrated. When ZEN Blue 2012 is opened, select “ZEN Pro”.
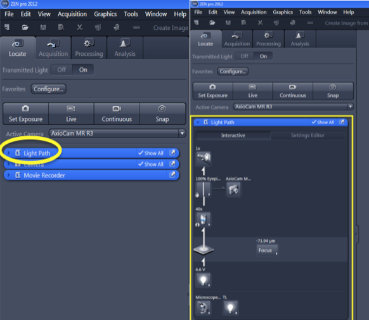
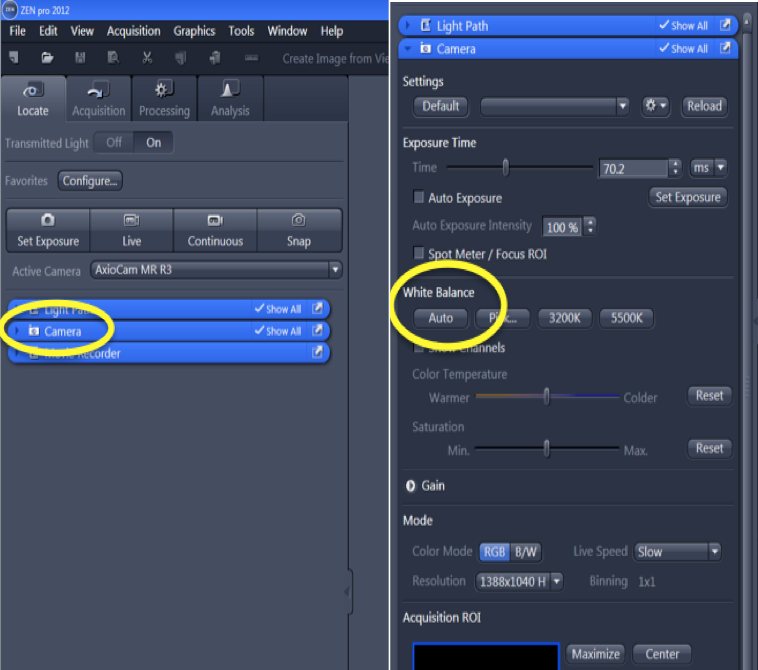
Before photographing, ensure that the microscope is recognized under the “Light Path” drop-down menu found in the “Locate” tab (this should be the tab open by default). If the program does not recognize the microscope, ensure the microscope is fully on and all necessary cables are connected. Then close ZEN Blue 2012 and reopen it.
Place a slide on the microscope stage and ensure it is under the 100x objective lens before adjusting the camera settings.
Note: Immersion oil should be placed on the slide before using the 100x objective lens.
In the ZEN Photography Interface, select “Live” to display a live image of the slide.
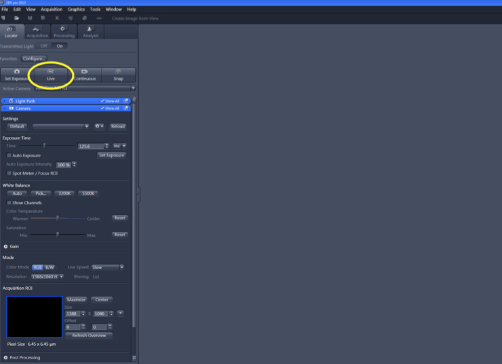
Select the “Set Exposure” located to the left of the “Live” to adjust the light intake of the camera so the image is properly displayed.
On the left menu, expand the “Camera” drop-down to reveal the “White Balance” section. While focused on the slide medium, select “Auto” under “White Balance” to set the white.
Using the 20x or 40x objective, locate a pollen grain to photograph. There are six possible photographs that may be taken for each species: Polar View, Equatorial View, Surface Photo, Aperture Photo, Wall Structure, and Unique Feature. Not every species will display a Unique Feature, but the other five photographs should be taken for every species whenever possible.
Once a grain is located, switch the microscope into the 100x objective view for photography. Select “Live” to enable the live camera feed.
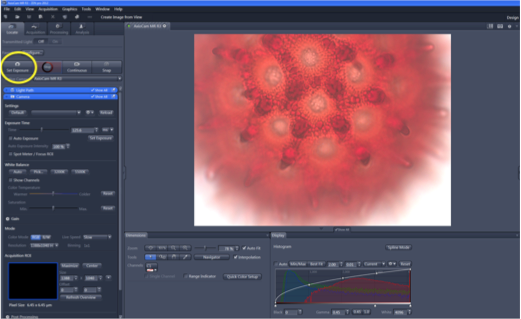
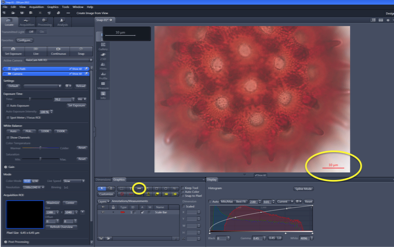
Using the fine focus on the microscope, adjust the image until it clearly shows one of the six possible photograph positions. The live image can be adjusted prior to taking a picture by adjusting the White, Black, and Gamma options on the histogram located below the live image.

To take a picture, click “Snap” to the right of “Continuous”. The image will be captured and it will appear as a thumbnail image to the right of the screen.
Below the captured image, find the “Graphics” tab and place a scale bar on the captured image using the “ruler” function. The scale bar should always be 10 microns long and placed in alignment with the bottom-right side of the grain.
If Auto-Save is set up, the picture will automatically save under the designated file as “Snap-01”, etc. and it will need to be renamed before being exported. If the image is not saved automatically, or to rename the save file, right click on the thumbnail image. Select “Save Selected As” to save the image.
Note: The photos saved with the format .czi will only open in ZEN Blue and must be exported into a different format to be viewed outside of the ZEN Interface.
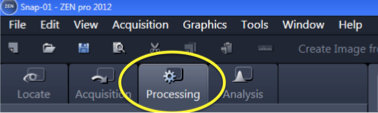
Once the required photographs are obtained, select the “Processing” tab found to the right of the “Locate” tab.
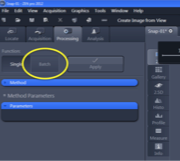
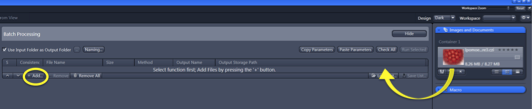
Under the “Processing” tab, select the option for “Batch” export. Only saved photographs may be exported, so ensure the images are saved before trying to export.
Photos may be added into the export queue one of two ways: 1) simply drag the saved thumbnails from the right into the defined export box or 2) at the bottom of the export box, select “Add” and open all necessary pictures from their file location.
Once the photos appear in the list, select “Image Export”. Selecting this option will make another box appear below.
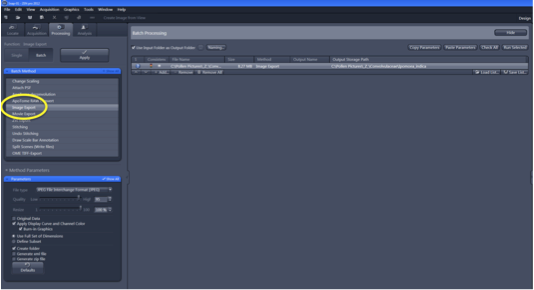
Using the drop-down, change the file type from JPEG to TIFF, unselect “Convert to 8 Bit”, and change the compression range to “None”. At the bottom of the box, select the option to retrieve xml file (metadata) from each of the pictures, and unselect the option to put each exported picture into its own folder. In the upper right-hand corner of the screen, select “Copy Parameters”.

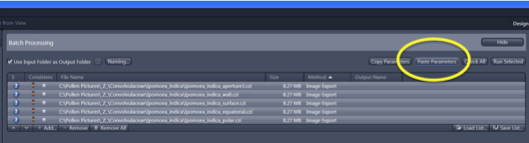
Then, select all of the images at once and “Paste Parameters”.
Once the specified parameters appear on all of the photographs, they can be exported using the “Run Selected” option in the upper right-hand corner of the screen or by choosing “Apply” on the left side of the screen.
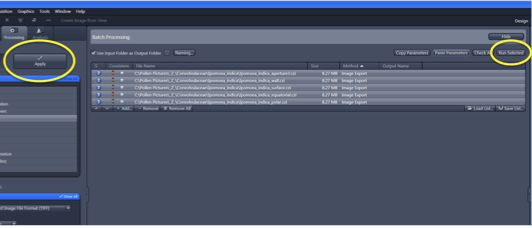
The photos will be exported to the designated file locations and can be viewed outside of ZEN Blue.
© Florida Institute of Technology, All Rights Reserved